Hi, I'm Tom. Welcome to our shop,
Carymart offers you the premium rf remote control equipment.
We suggest you reading our FAQs before making your decision.
If you have any other question, please contact us.
We will reply you as soon as possible.
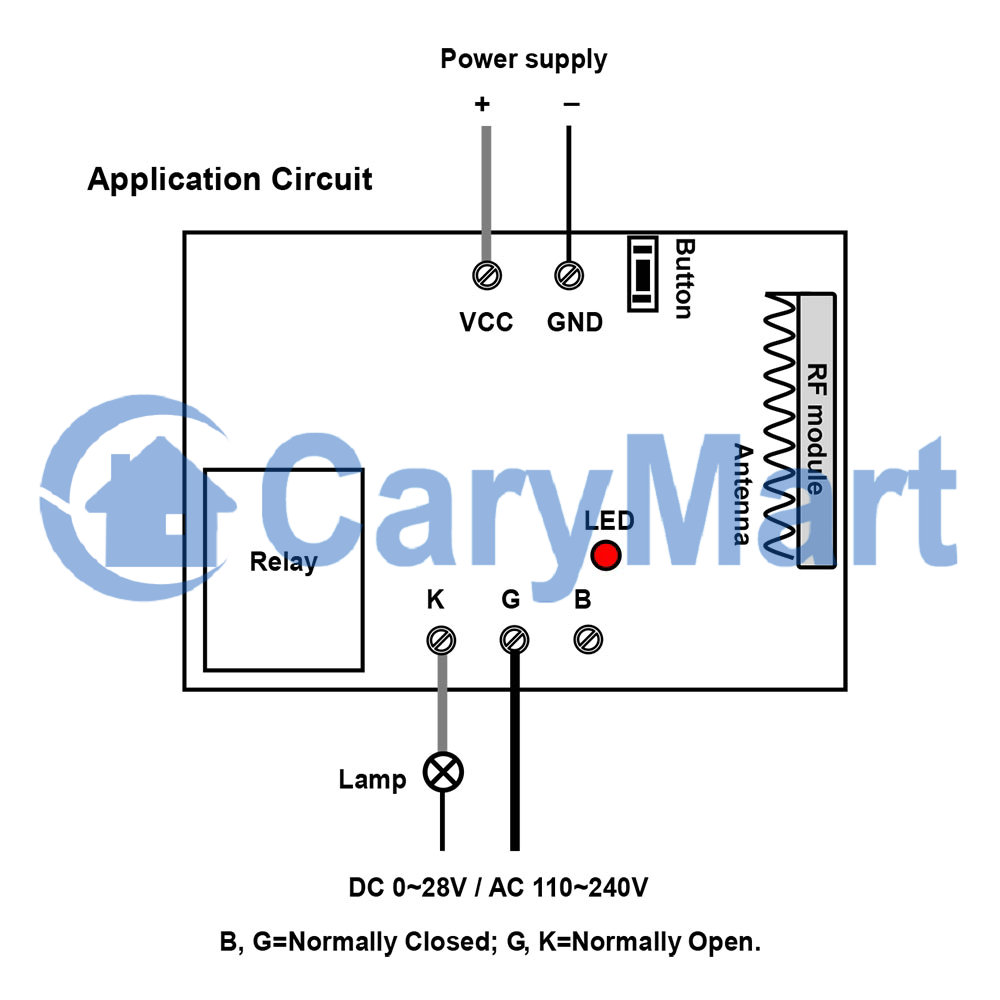
Control Lights, Motors, Fans, electrically operated Doors/Locks/Windows/Blinds/Cars or Other Appliances with AC110~240V or DC0~28V.
You can turn on/off the receiver with transmitter (remote control) from any place within a reliable distance; the wireless RF signal can pass through walls, floors and doors.
Adopt singlechip technology to build millions of code.
Two or more transmitter & receivers set can be used in the same place.
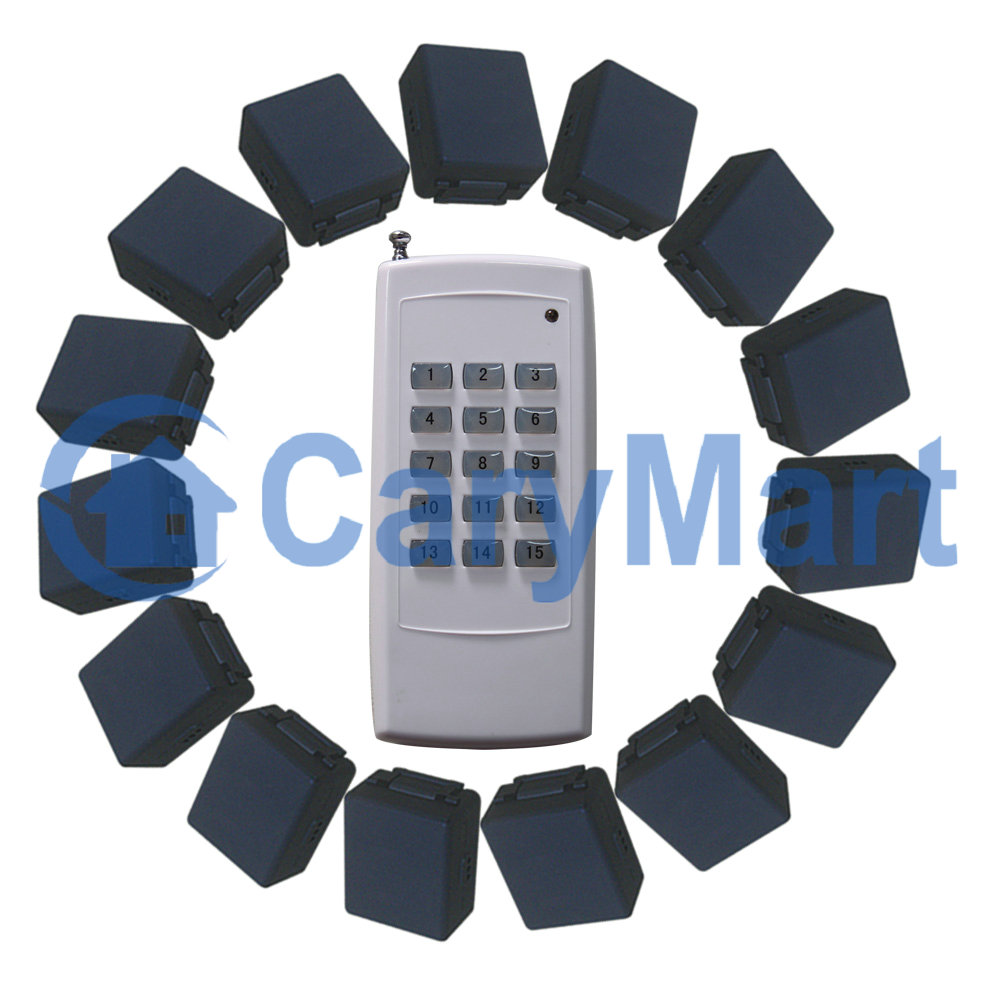
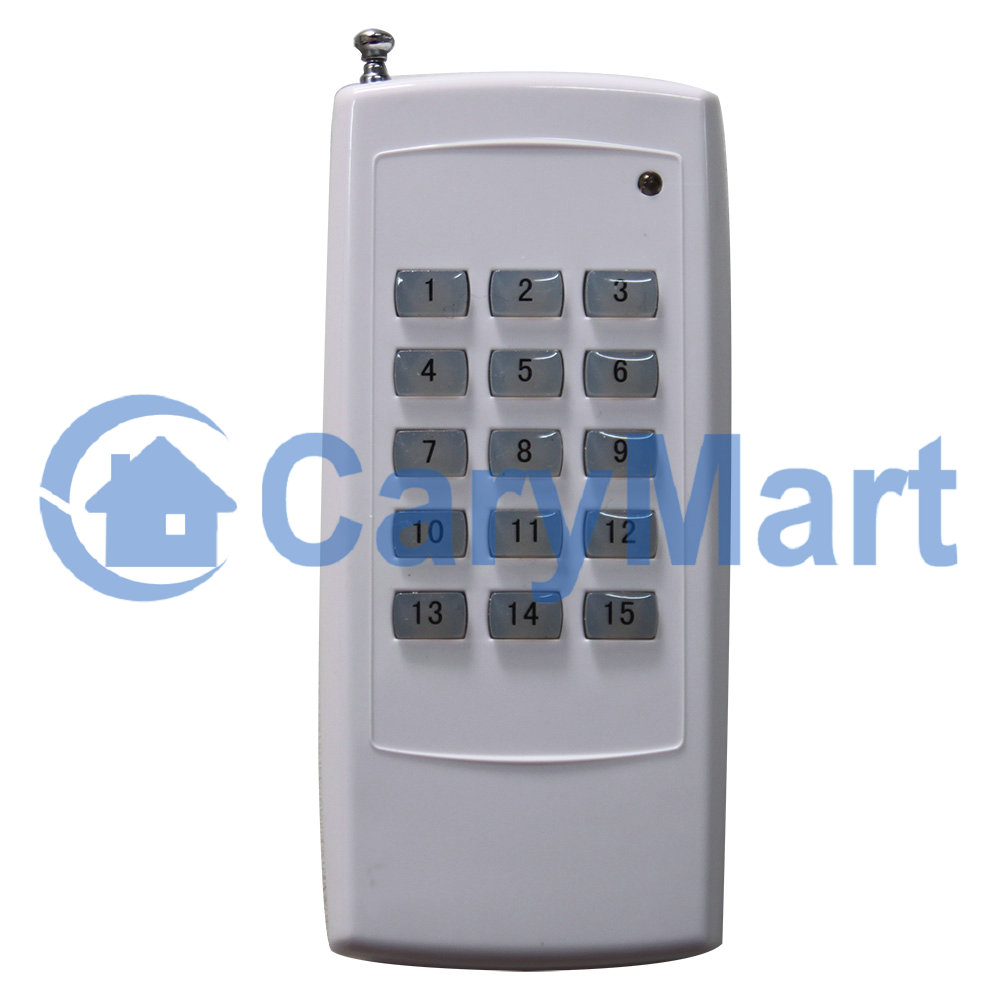
Transmitting Frequency: 433MHz
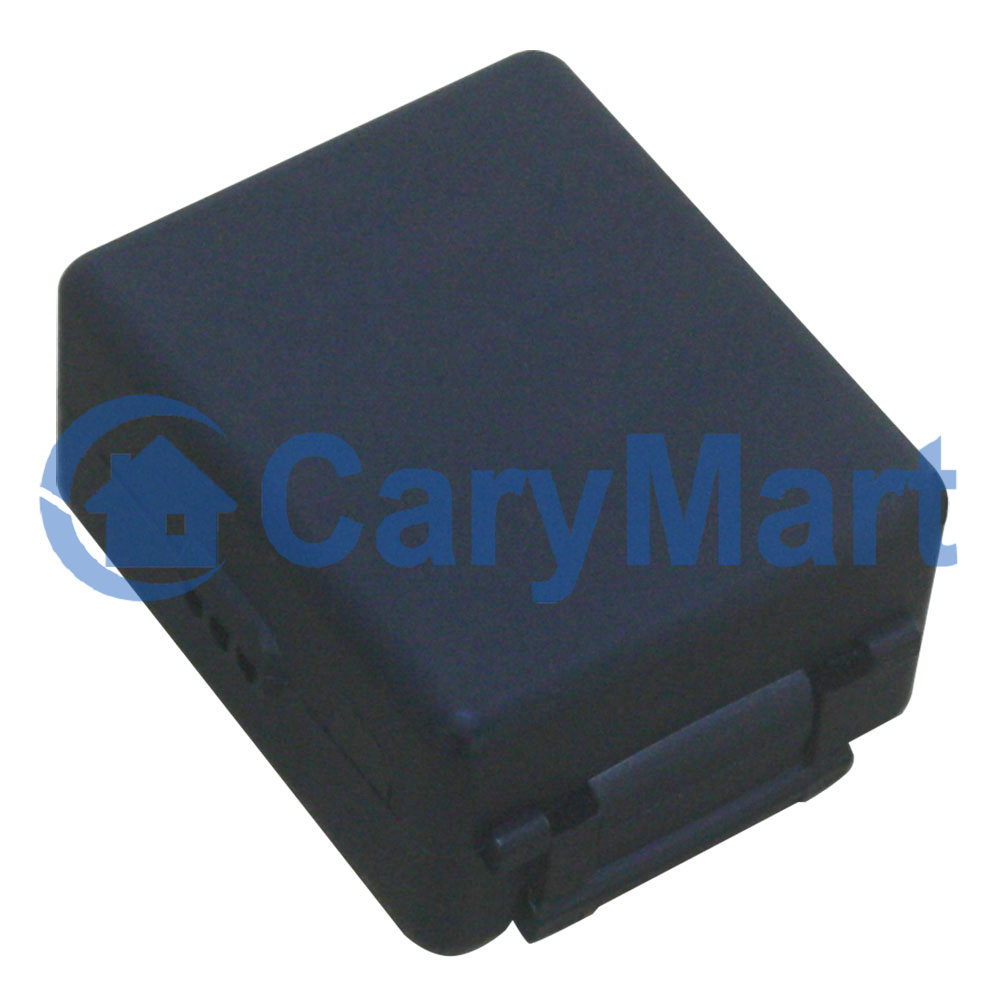
Receiver:
Model No.: S1RU-DC06 / S1RU-DC09 / S1RU-DC12 / S1RU-DC24
Channel: 1 CH
Control Modes: Self-locking, Momentary, Interlocking
Remote Control Distance: 500m / 1500ft (theoretically)
Encode: Fixed code by soldering
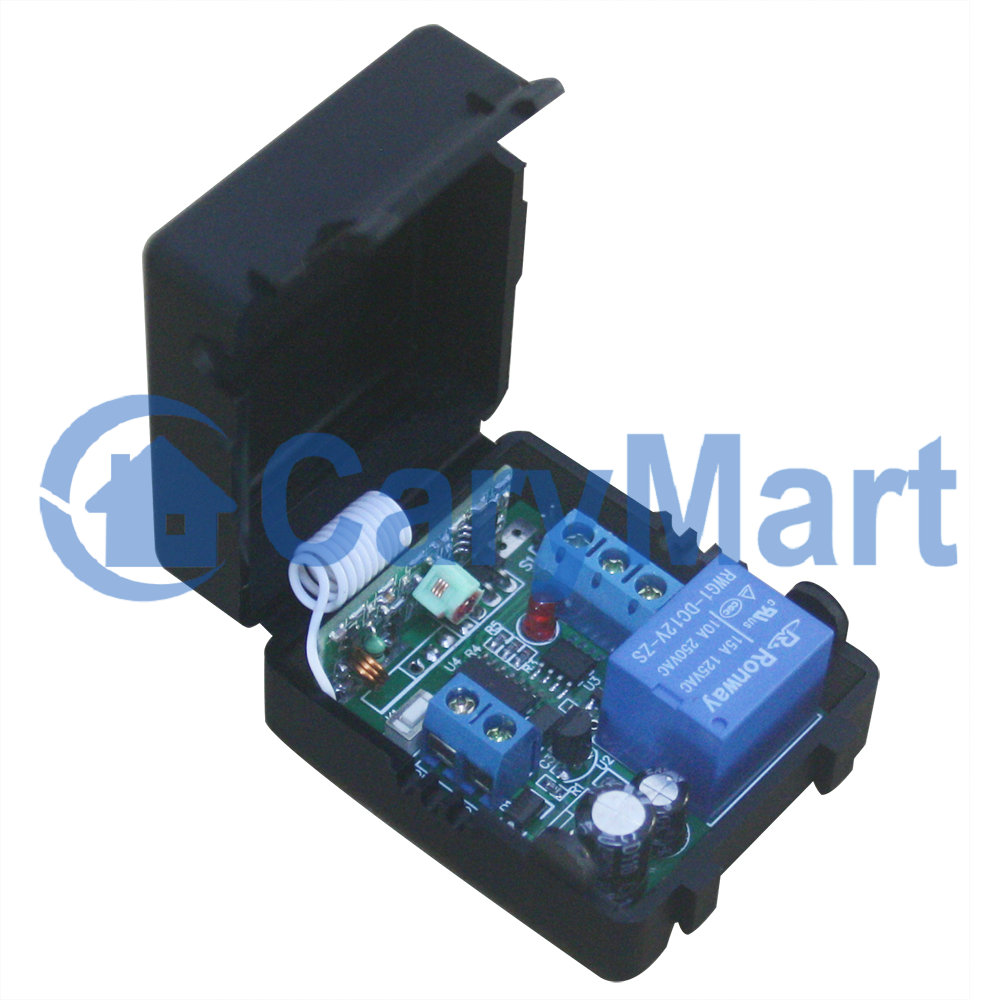
Unit size: 100mm x 45mm x 20mm
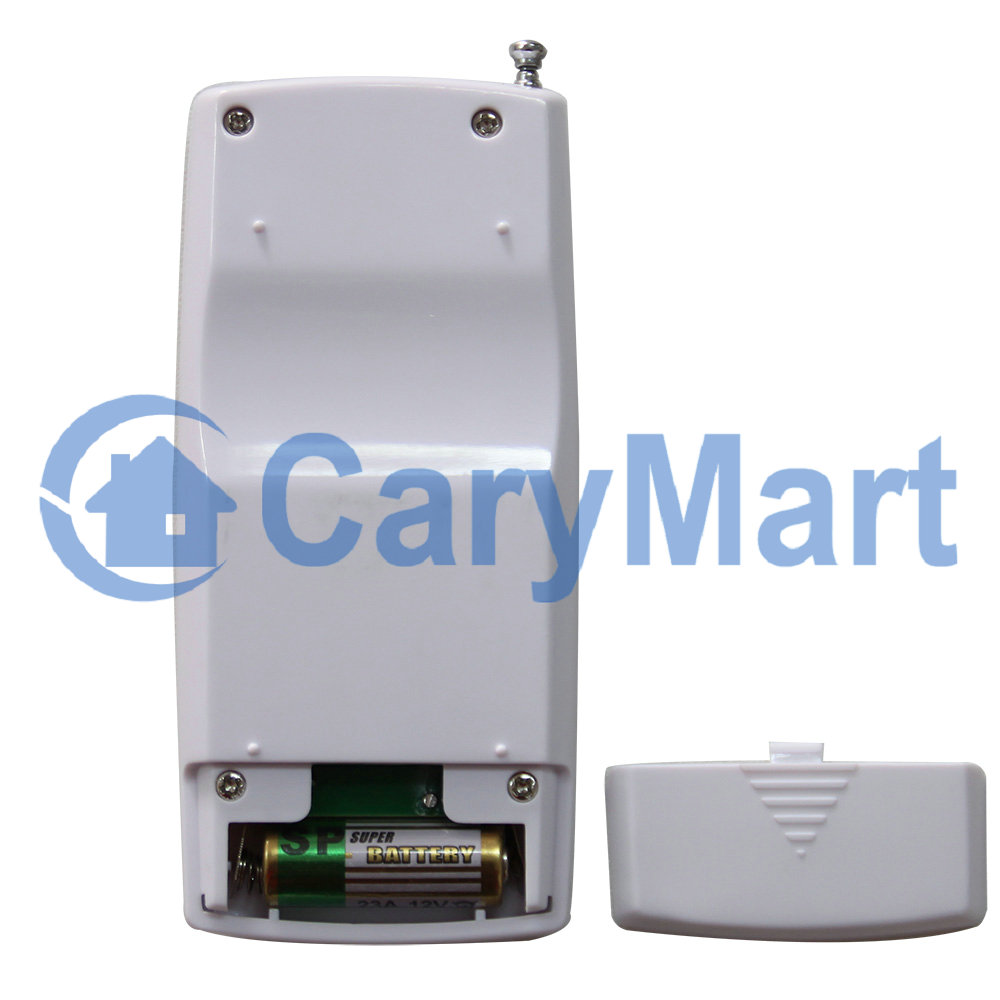
Power Supply: 1 x 23A -12V battery (included, can be used for 12 months)
Usage:
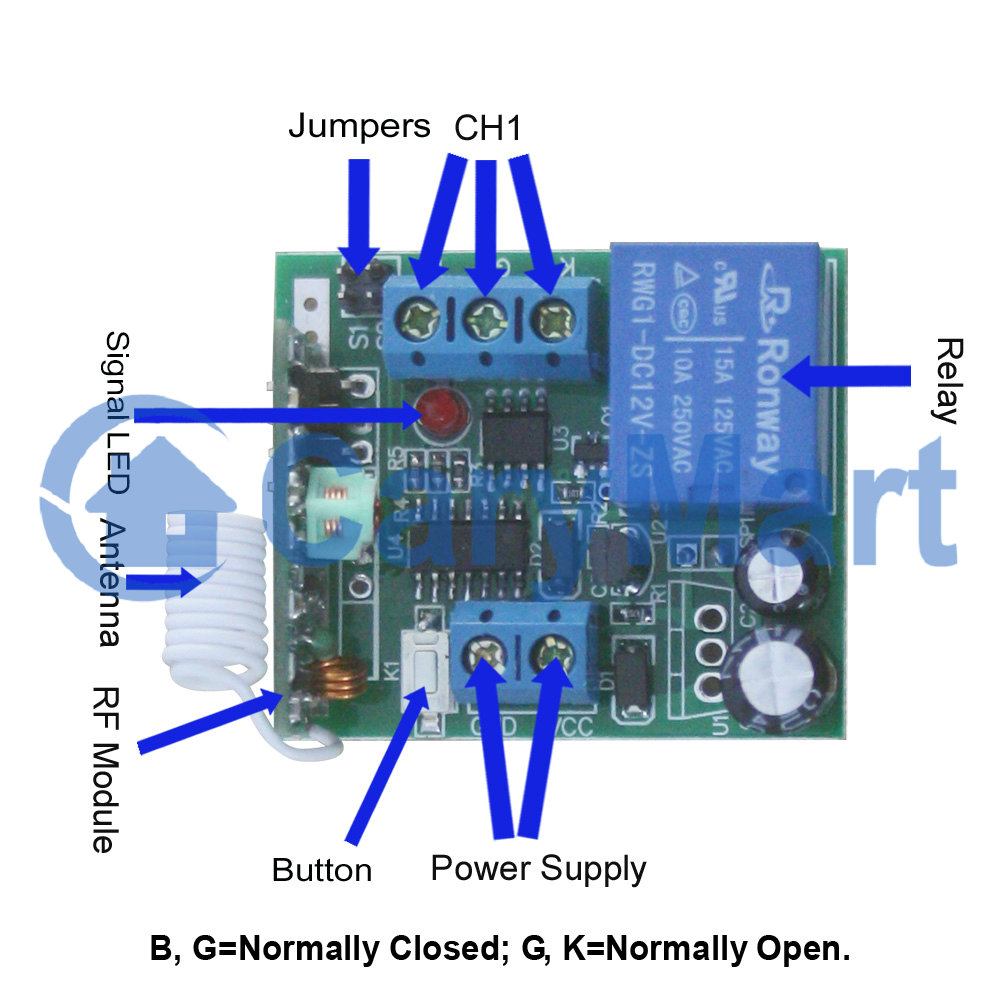
Initial state: B, G = Normally Closed; G, K = Normally Open.
Setting different control modes (We have set the receiver as Self-locking control mode before delivery. If you want to use other control modes, do as following operation):
Setting control mode Self-locking: Connect S2.
Control mode Self-locking: Press -> On; Press again -> Off.
Press button 1, turn on the relay of receiver 1, (connect G and K, disconnect B and G).
Press button 1 again, turn off the relay of receiver 1, (disconnect G and K, connect B and G).
Press button 2, turn on the relay of receiver 2, (connect G and K, disconnect B and G).
Press button 2 again, turn off the relay of receiver 2, (disconnect G and K, connect B and G). ……
Press button 14, turn on the relay of receiver 14, (connect G and K, disconnect B and G). Press button 14 again, turn off the relay of receiver 14, (disconnect G and K, connect B and G).
Press button 15, turn on the relay of receiver 15, (connect G and K, disconnect B and G). Press button 15 again, turn off the relay of receiver 15, (disconnect G and K, connect B and G).
Setting control mode Momentary: Connect S1.
Control mode Momentary: Press and hold -> On; Release -> Off.
Press and hold button 1, turn on the relay of receiver 1, (connect G and K, disconnect B and G). Release button 1, turn off the relay of receiver 1, (disconnect G and K, connect B and G).
Press and hold button 2, turn on the relay of receiver 2, (connect G and K, disconnect B and G). Release button 2, turn off the relay of receiver 2, (disconnect G and K, connect B and G). ……
Press and hold button 14, turn on the relay of receiver 14, (connect G and K, disconnect B and G). Release button 14, turn off the relay of receiver 14, (disconnect G and K, connect B and G).
Press and hold button 15, turn on the relay of receiver 15, (connect G and K, disconnect B and G). Release button 15, turn off the relay of receiver 15, (disconnect G and K, connect B and G).
Setting control mode Interlocking: Disconnect S1 and S2.
Control mode Interlocking: Press -> On, other relays Off; Press another button -> Off.
Press button 1, turn on the relay of receiver 1, (connect G and K, disconnect B and G), turn off the relay of receiver 2,3,4,5,6,7,8,9,10,11,12,13,14,15 (disconnect G and K, connect B and G).
Press button 2, turn on the relay of receiver 2, (connect G and K, disconnect B and G), turn off the relay of receiver 1,3,4,5,6,7,8,9,10,11,12,13,14,15 (disconnect G and K, connect B and G). ……
Press button 14, turn on the relay of receiver 14, (connect G and K, disconnect B and G), turn off the relay of receiver 1,2,3,4,5,6,7,8,9,10,11,12,13,15 (disconnect G and K, connect B and G).
Press button 15, turn on the relay of receiver 15, (connect G and K, disconnect B and G), turn off the relay of receiver 1,2,3,4,5,6,7,8,9,10,11,12,13,14 (disconnect G and K, connect B and G).