Package Include:
1 x Telephone controller: TC-02
1 x User manual
Feature:
Wireless control, easy to install.
Control variety of home appliances and electronic products in any place
worldwide by fixed telephone or mobile phone.
Remote control Lights, TVs, Motors, Fans, Cameras, Video/ Audio signals,
Electrically operated Doors/ Locks/ Windows/ Curtains/ Bell or other
equipments with voltage AC 110~240V or DC 0~48V.
Relay Output: This remote control switch is dry relay output; it can be used
to operate both DC and AC equipment.The output terminals are normally / open normally closed, serving as a switch.
Password protection
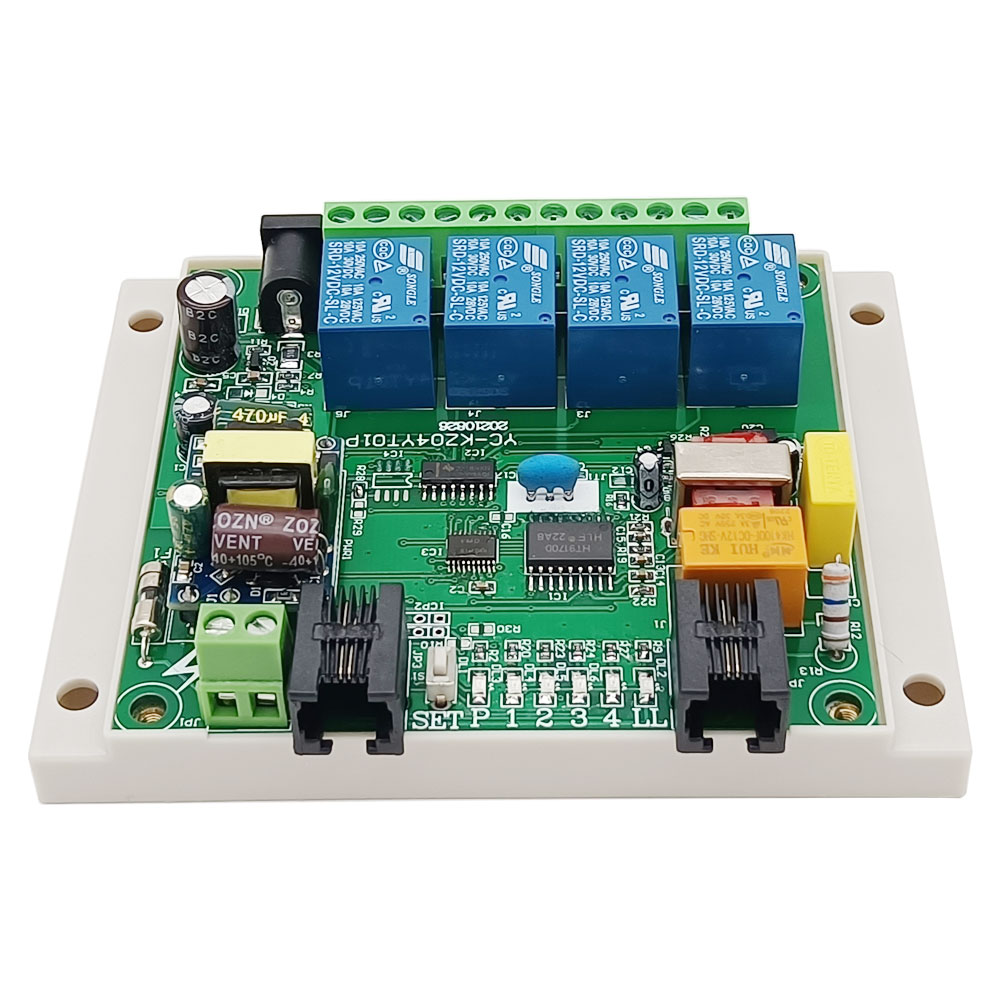
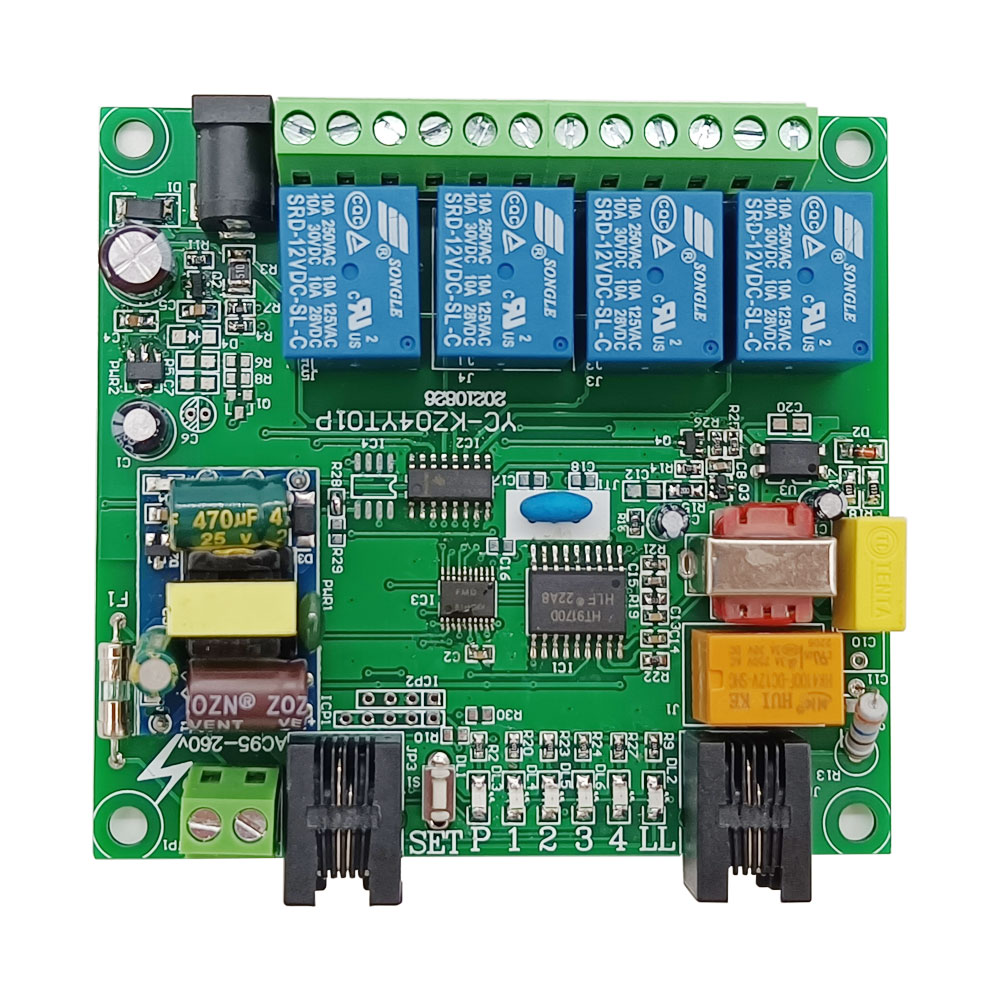
4 Ways relays outputs
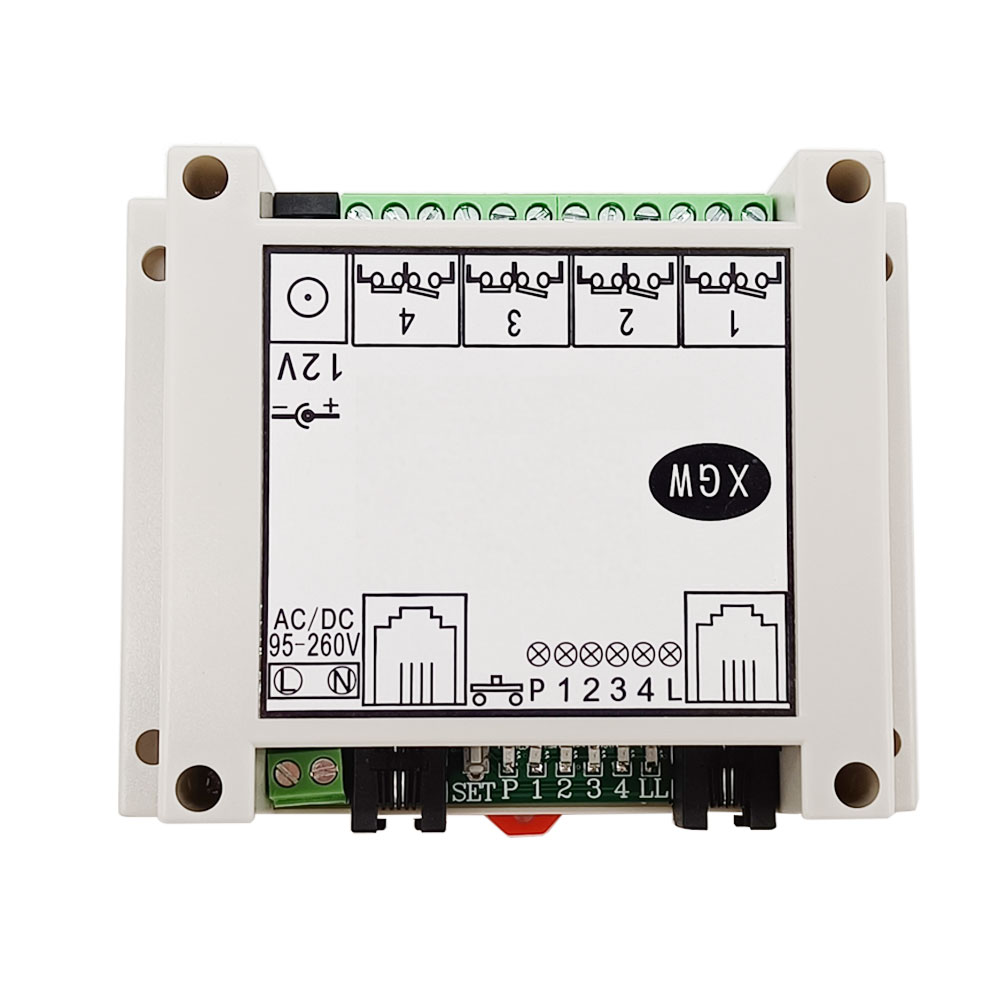
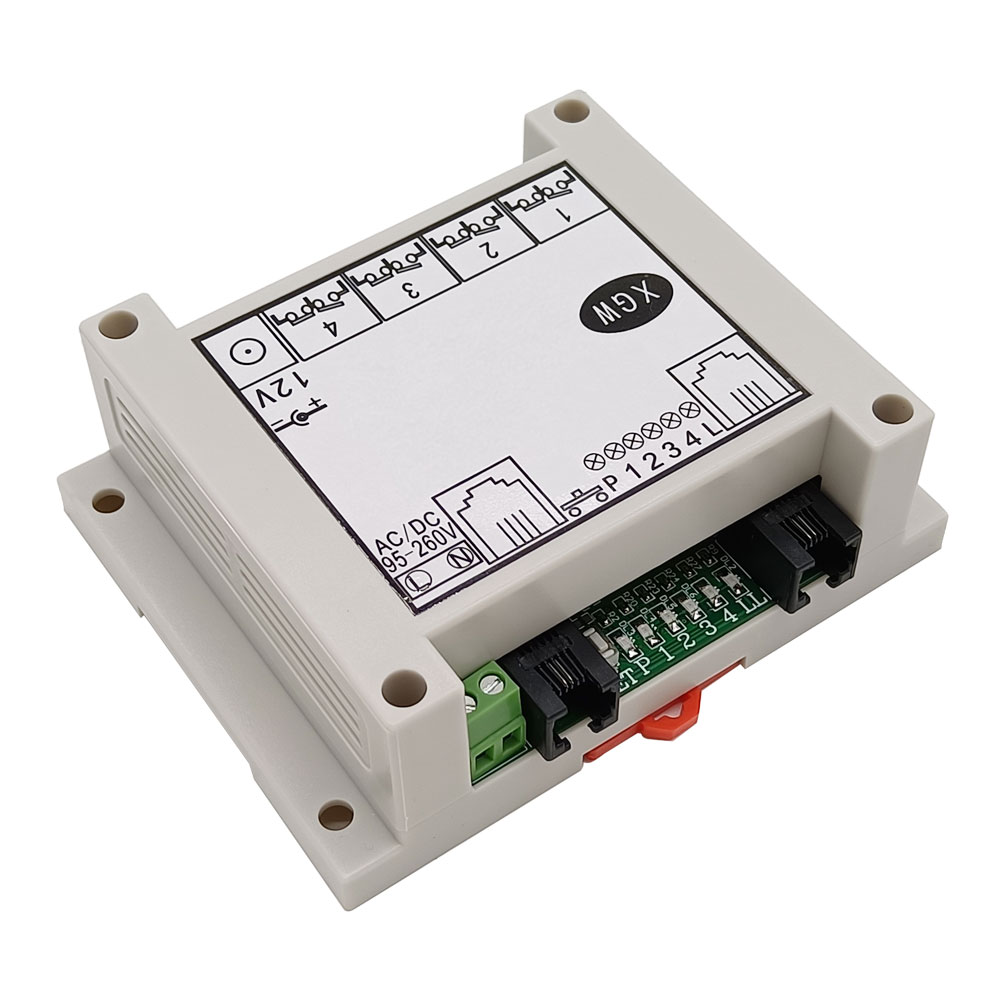
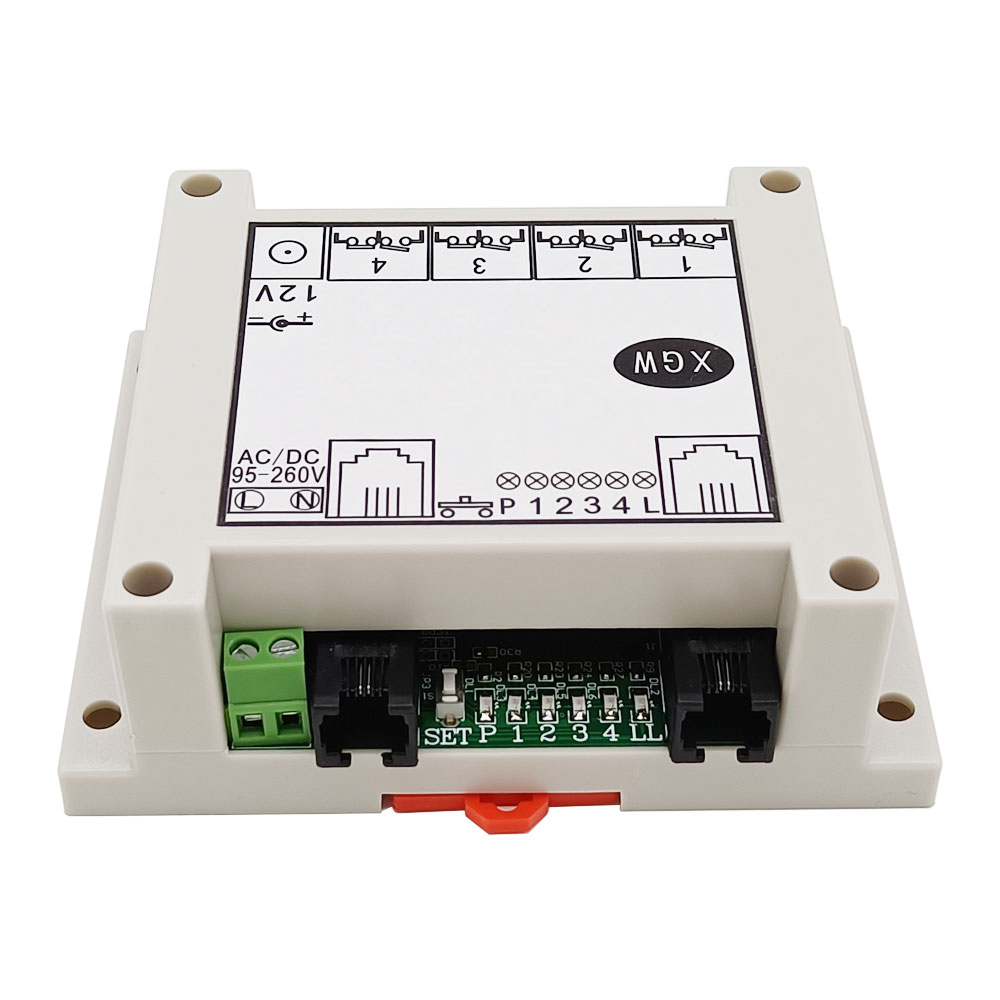
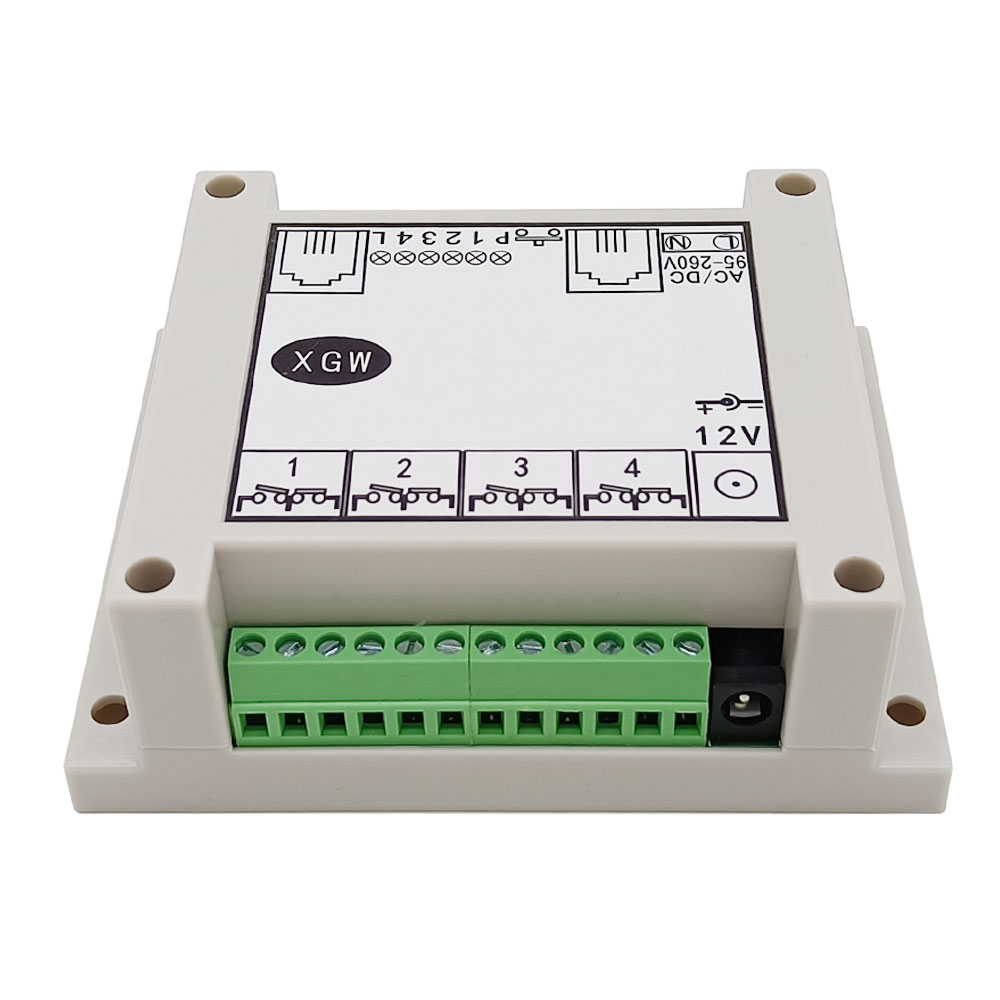
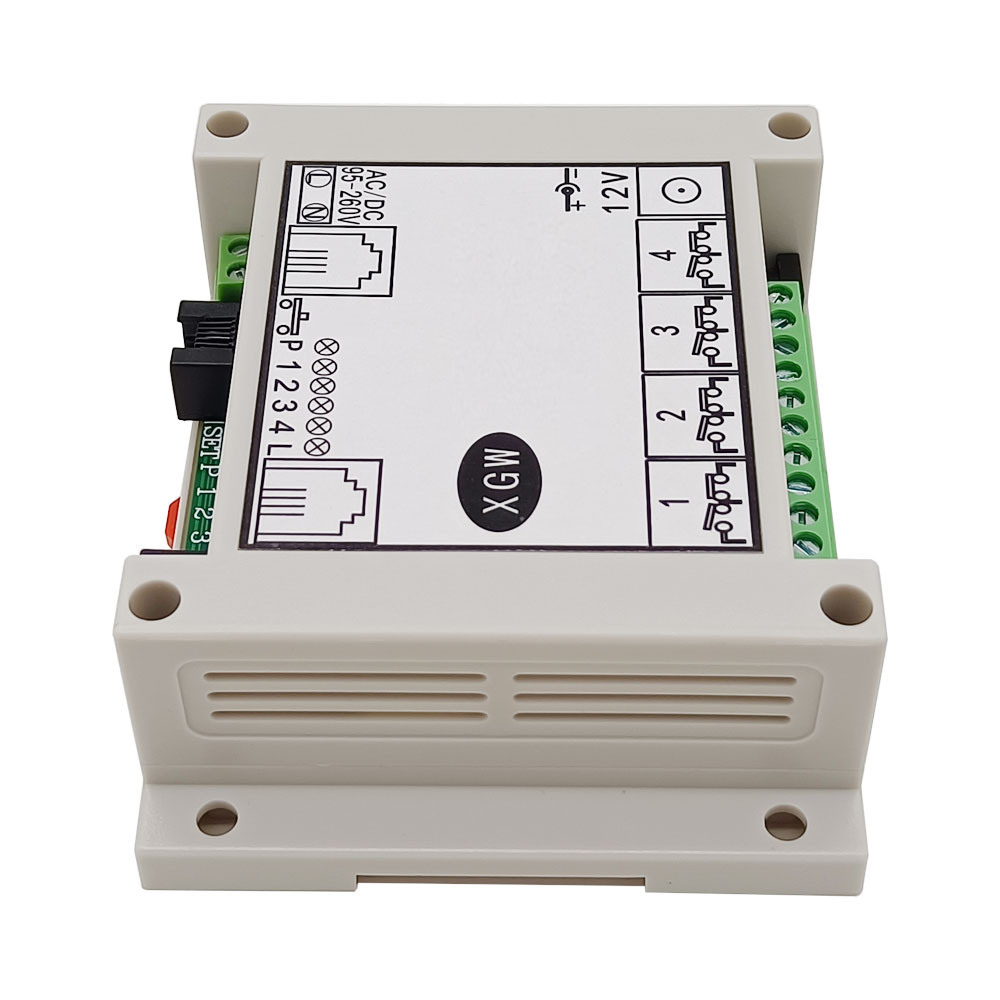
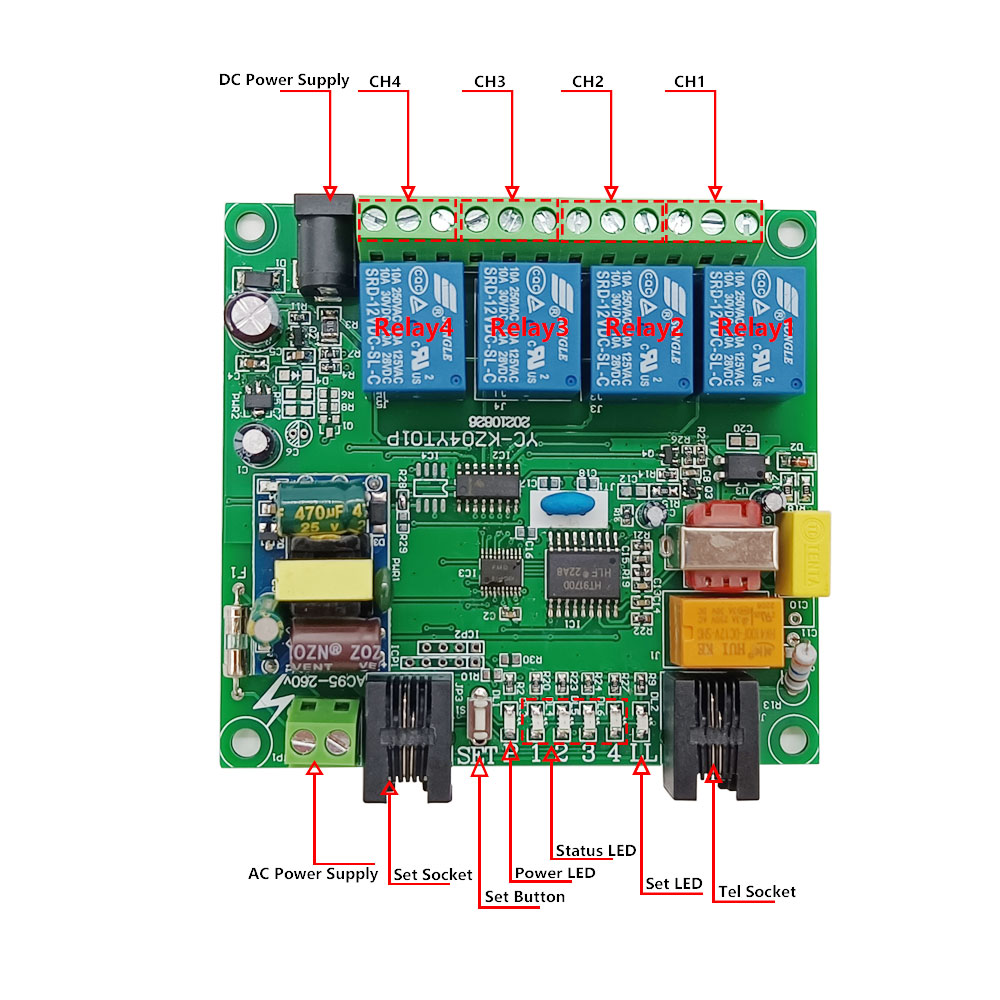
Receiver Parameters:
Model: TC-02
Channel: 4 CH
Power Supply: 12V DC or 95-260V AC
Size: 115 x 90 x 40 mm (4.5 x 3.5 x 1.6 inches)
Static Current: 10mA
Working Voltage Range of Relay: AC 110~240V or DC 0~48V
Max. Working Current of Relay: 10A
Wiring:
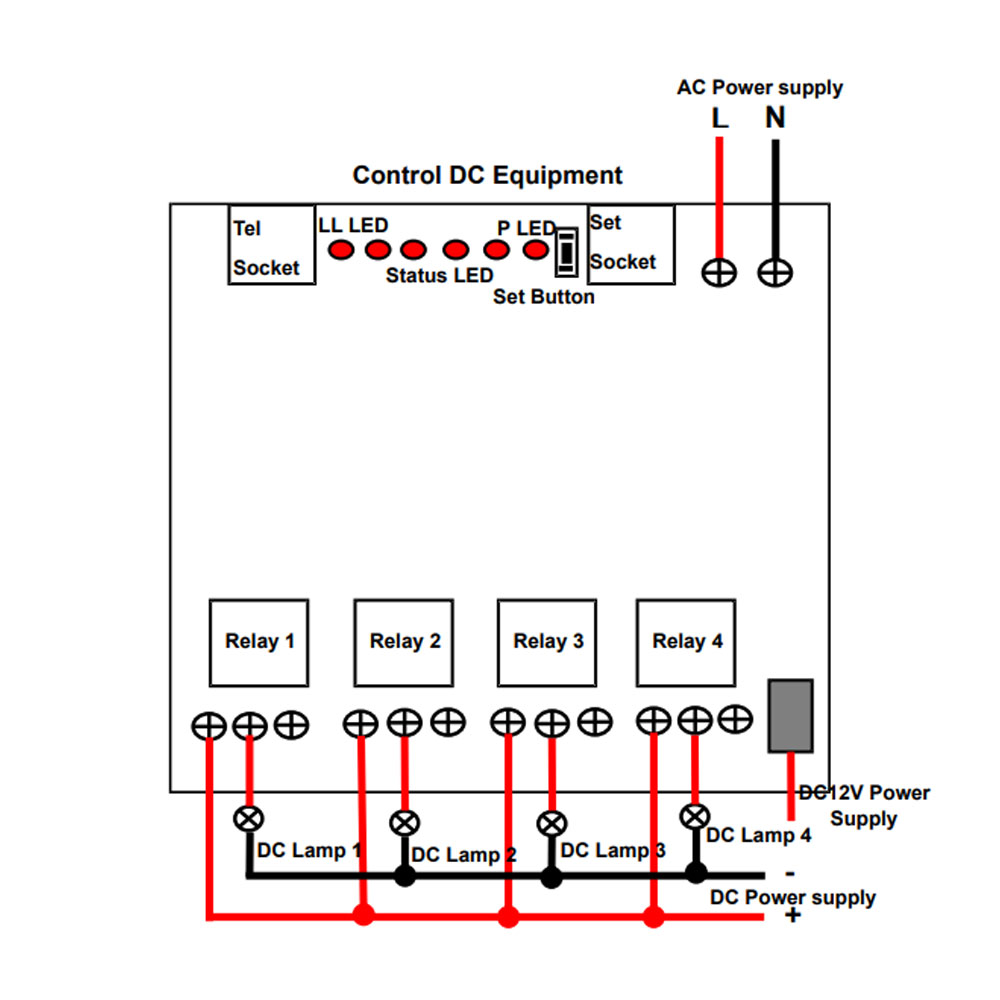
1) If you want to control a DC 12V lamp, do as following:
1.1 Connect the telephone line to terminal of the controller.
1.2 Connect DC 12V power supply or AC power supply to the controller.
1.3 Connect normally open terminal to the positive pole of DC power supply,
connect common terminal to the positive pole of DC lamp, and connect the
negative pole of DC lamp to the negative pole of DC power supply.
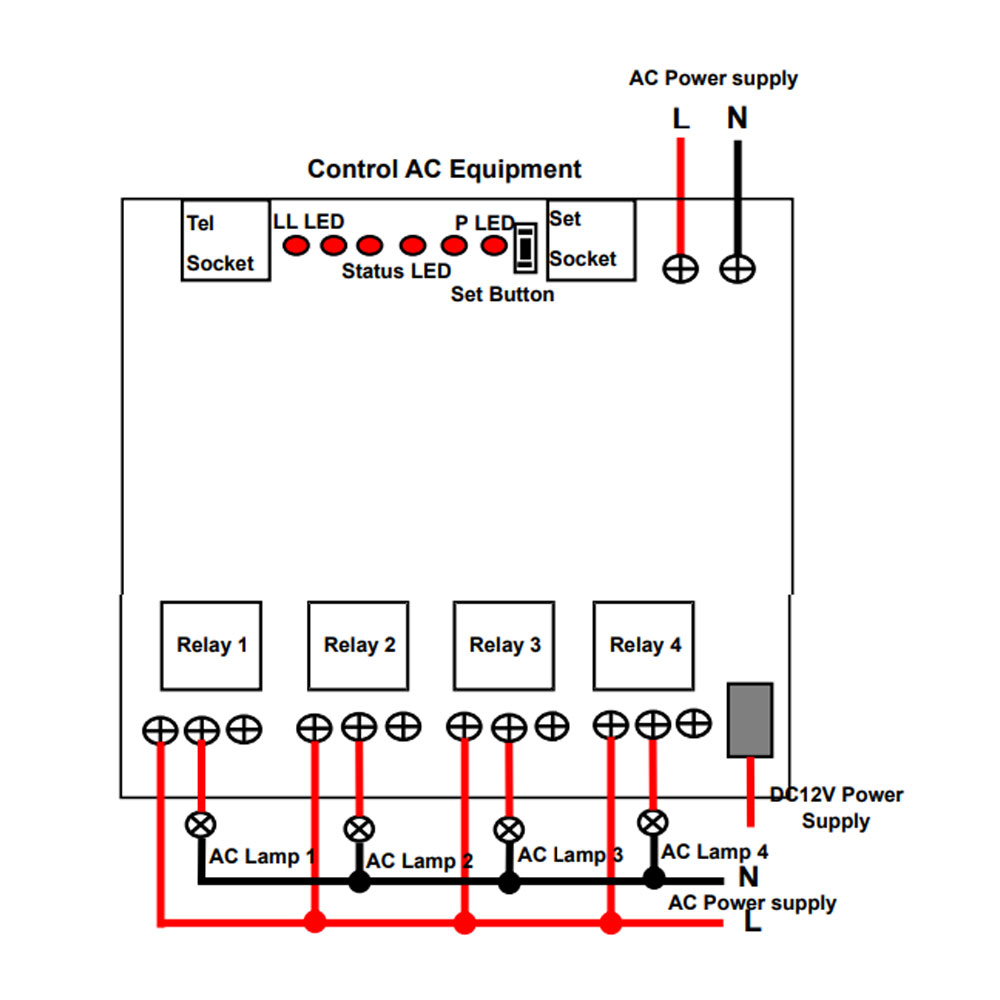
2) If you want to control an AC 220V lamp, do as following:
2.1 Connect the telephone line to terminal of the controller.
2.2 Connect DC 12V power supply or AC power supply to the controller.
2.3 Connect normally open terminal to the live wire of AC power supply,
connect common terminal to one side of AC lamp, and connect another side of
AC lamp to the neutral wire of AC power supply.
Operation:
1) Input password:
Dial the telephone number of the phone line which the controller is
connected, the telephone could be connected automatically after 6 ringing.
After entering the 4 - digit password continuously, press the "#" button to
confirm. If the password is correct, it will prompt "DD" two sounds. If it
is wrong, it will prompt "DDD" three sounds. If the password is entered
incorrectly, you can press the "*" button to cancel, and then re-enter the
4-digit password. There are 10 opportunities to enter passwords in total.
After 10 times, the host will hang up the phone after 9 beeps of "D", then
you need to restart the operation of this controller. This function can
prevent the phone from being occupied.
Note: When the controller is connected to the phone, the first password must
be entered within 20 seconds, otherwise it will automatically hang up the
phone after 20 seconds, and the delay will be 20 seconds each time the
button is pressed.
2) The operation of controller:
After entering the 4-digit password correctly and pressing the "#" button to
confirm, the controller will prompt "DD" two sounds, it means that the
controller can start to operate.
Input 1: Turn on the channel 1, the indicator light 1 is on, and a "DD" beep
will sound.
Input 2: Turn on the channel 2, the indicator light 2 in on, and a "DD" beep
will sound.
Input 3: Turn on the channel 3, the indicator light 3 is on, and a "DD" beep
will sound.
Input 4: Turn on the channel 4, the indicator light 4 is on, and a "DD" beep
will sound.
Input 5: Turn off the channel 1, the indicator light 1 is off, and a "DDD"
beep will sound.
Input 6: Turn off the channel 2, the indicator light 2 is off, and a "DDD"
beep will sound.
Input 7: Turn off the channel 3, the indicator light 3 is off, and a "DDD"
beep will sound.
Input 8: Turn off the channel 4, the indicator light 4 is off, and a "DDD"
beep will sound.
Check the current working status:
When you need to check the current working status, first input 9, then input
1 or 2, 3, 4 to check the working status of four channels. For example,
enter 91 to query the working status of the channel 1. If the channel 1 is on, there will be two prompts of "DD", and if the
channel 1
is off, there will be three prompts of "DDD".
After the operation, press the "#" key to confirm, the controller will
automatically hang up the phone after 4 sounds of "D".
If no key is pressed within 20 seconds, the controller will automatically
hang up the phone after 9 sounds of "D".
If you do not press the "#" key to confirm, you can continue to input.
Setting the controller:
Need to enter 17 digits numbers continuously for setting, these 17 digits
numbers are password, number of rings, working mode and working time.
17 digits numbers: 8888 (4-digit password) + 6 (number of rings) + 1
(channel 1 working mode) + 0 (channel 2 working mode) + 1 (channel 3 working
mode) + 0 (channel 4 working mode) + 01 (channel 1 working time) + 00
(channel 2 working time) + 10 (channel 3 working time) + 00 (channel 4
working time)
1) First 4 digits numbers: a 4-digit password that needs to be
entered when starting the controller, the default value is 8888.
2) The 5th digit number: number of rings. It is determined according
to the maximum actual number of rings in the place, generally between 1 - 8,
and the controller may not be able to connect the phone after exceeding.
3) Next 12 digits numbers: working mode and working time:
The first 4 digits numbers represent the working modes of the 4 channels
respectively, and the following 8 digits numbers represent the working time
of the 4 channels respectively.
Working mode: Each digit number represents the working mode of a
channel, 1 is momentary mode, 0 is self-locking mode. For example, 1010
means channel 1 and channel 3 are momentary mode, and channel 2 and channel
4 are self-locking mode.
Working time: Each 2 digits numbers indicate the working time of a
channel. For example, 10 means working time is 10 seconds.
When set to momentary mode, you need to set working time at the same time.
If set to self-locking mode, you can set working time to 00.
By default, their working mode and working time is as follows,
The channel 1: momentary mode with 1 second, and it will automatically turn
off after 1 second.
The channel 2: Self-locking mode.
The channel 3: momentary mode with10 seconds, and it will automatically turn
off after 10 second.
The channel 4: Self-locking mode.
If you want to change this default setting, you need to enter 17 digits
numbers to reset.
For example: If you want to set the password to 5678, the number of rings is
4 times, the channels 1, 2 and 3 are self-locking modes, and the channel 4
is momentary mode with 5 seconds, the 17 digits that need to be input are as
follows:
5678 4 0 0 0 1 00 00 00 05
Two setting methods:
1) Method 1:
Firstly, power on the controller, then use a double crystal head phone cable
to connect one end to a normal telephone, the other end to be inserted into
the “Setting” socket of the controller, then press the “SET” button of the
controller, and the "LL" light on the main board of the controller is always
on, prompting "DD" twice, the controller enters the setting state,
indicating that the 17 - digit numbers to be set can be input, and after
continuously inputting 17 - digit numbers, press the “#” button to confirm.
After confirming that there is no error, press “SET” button again to exit
the setting state, and the "LL" light is off. If you make a mistake, you can
press the "*" key to re-enter.
2) Method 2:
Connect the normally used telephone line to the “telephone” interface of the
controller, and then use another phone that can be dialed to dial the phone
connected to the controller. When there is the first ring back, press the
“SET” button on the controller main board, the controller is connected to
the phone, the “LL” light is on, and “DD” is prompted twice, which means
that the controller is in the setting state. Enter the 17-digit numbers to
be set, and press the "#" key to confirm after continuously inputting
17-digit numbers. After confirming that it is correct, press the “SET”
button again to exit the setting state, and the “LL” light is off. (This
method is recommended to be performed on the switch.)
Reset the controller to factory settings:
If the controller is abnormally controlled or the settings are wrong, the
controller can be restored to the factory settings.
Operation: first power off the controller, wait for about 5~10 seconds,
after the indicator lights on the controller are all off, press and hold the
“SET” button on the controller, then power on the controller, and release
the button after the “LL” light is on, and then the “LL” light is off,
indicating that the factory setting has been restored.